Sometimes a club may need to replace a member photo for someone who’s already been approved by the District. Clubs can upload a new photo for the member and trigger a request to their District to approve the photo change, without needing the District to unapprove the member first. This can be done via the Team Roster page or the member’s profile page. Both methods are outlined below.
For clubs using PowerUp as their day-to-day registration software, updates to the member’s photo (new photo uploaded, new cropping/sizing of an existing photo) in the club’s PowerUp will trigger a request for District approval.
IMPORTANT NOTES:
Each season prior to submitting teams for approval, clubs may upload a new photo for a member as needed.

If no new photo is uploaded, the existing one from the previous season is copied over to the new season automatically.

The current photo will continue to appear on the team roster and member card until the replacement photo is approved. The text at the top of the "Update photo" slideout will tell you if the new photo will be used immediately, or if approval is required.

Member photos from previous seasons will remain accessible on the member’s profile via a "photo season" dropdown. This means an admin can look back at a member’s historical photo in a specific season if needed.
Via the Team Roster Page
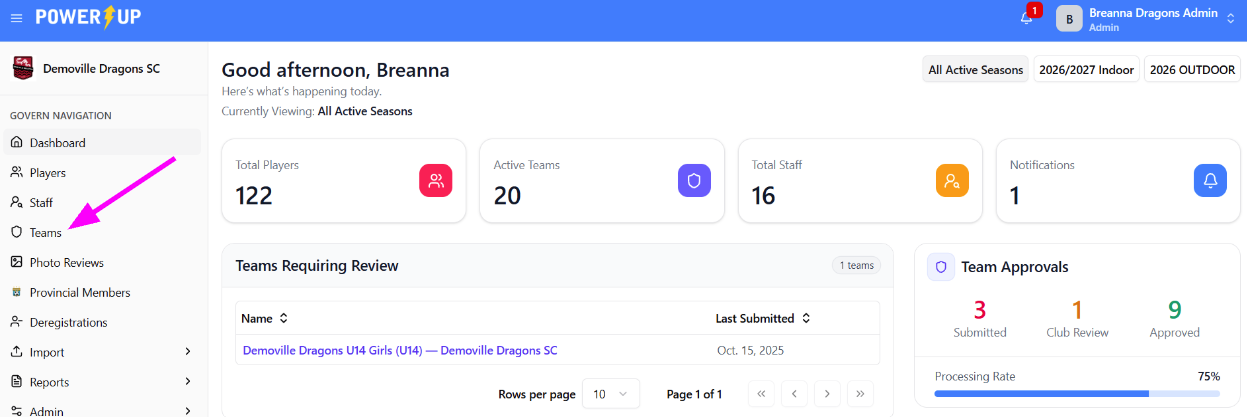
- After logging into the Ontario Soccer Govern module as a Club Administrator, navigate to the Teams option in the Govern Navigation menu on the left.
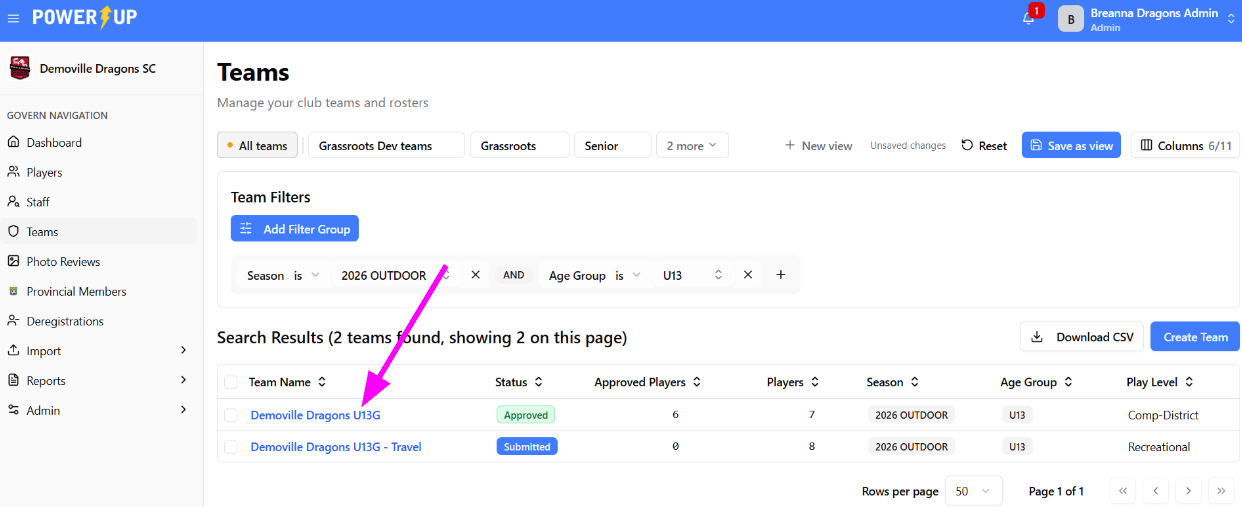
- From the list, select the team where the member whose photo needs to be updated is assigned. If needed, you can add a filter to drill down to the specific team.
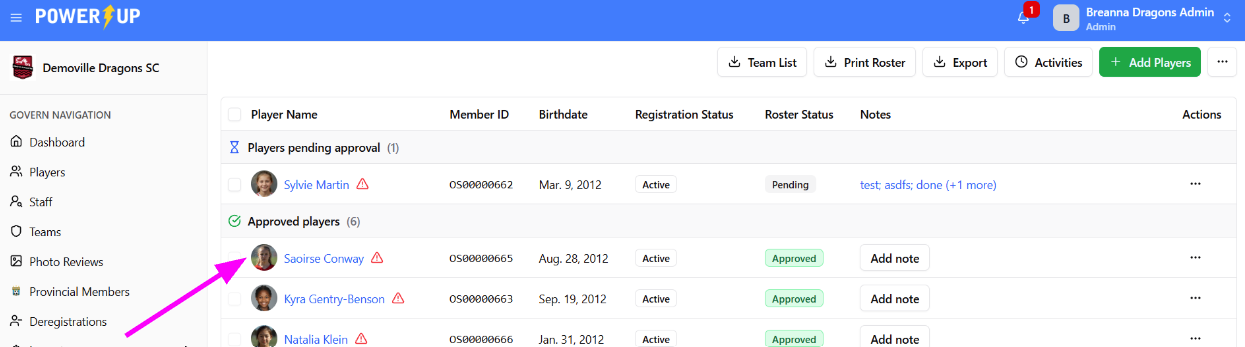
- Click the member’s photo to the left of their name.
- A slideout will appear on the right. Click the Choose Different Imagebutton to select a new photo for the player.
- Note the text underneath the "Update photo" header at the top of the slideout. It confirms the current photo will continue to be used until the replacement photo is approved.
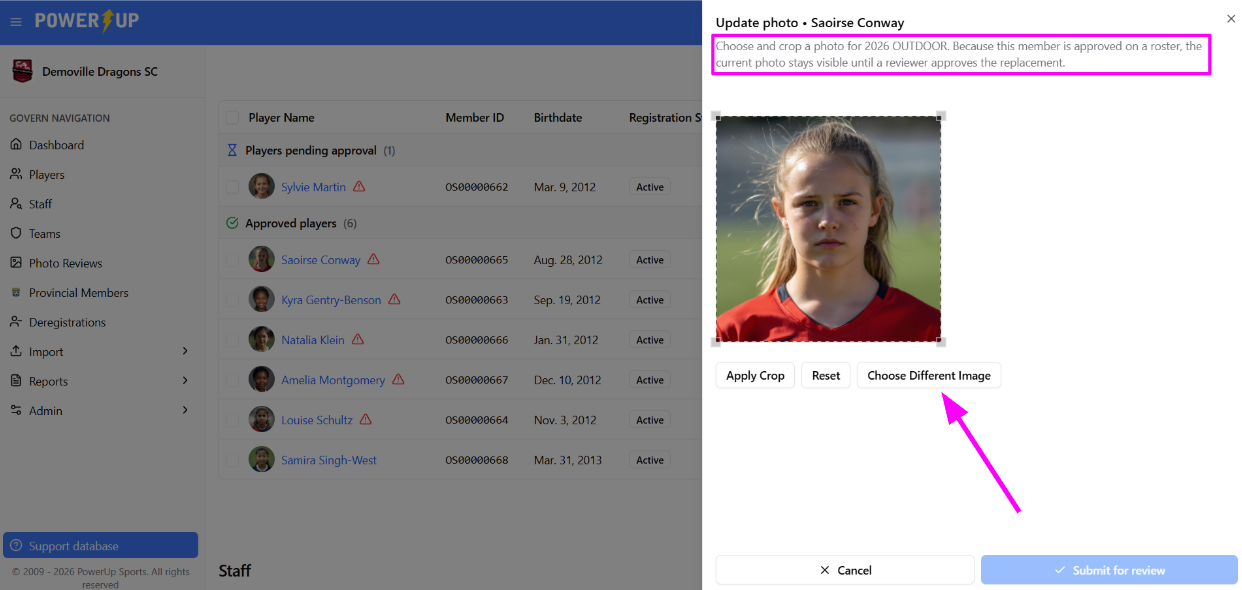
- Note the text underneath the "Update photo" header at the top of the slideout. It confirms the current photo will continue to be used until the replacement photo is approved.
- Select the desired new photo from your computer.
- You’ll be presented with a tool to crop the photo. Click and drag the corners to resize the cropped area, and click and drag the square to choose your crop area. Make sure it complies with your governing body’s requirements (e.g. head and shoulders, facing forward, no hats, etc.). When ready, click Apply Crop.
- When ready to proceed, click the Submit for Review button. This action will trigger a request for your District Admin to review and approve the replacement photo.
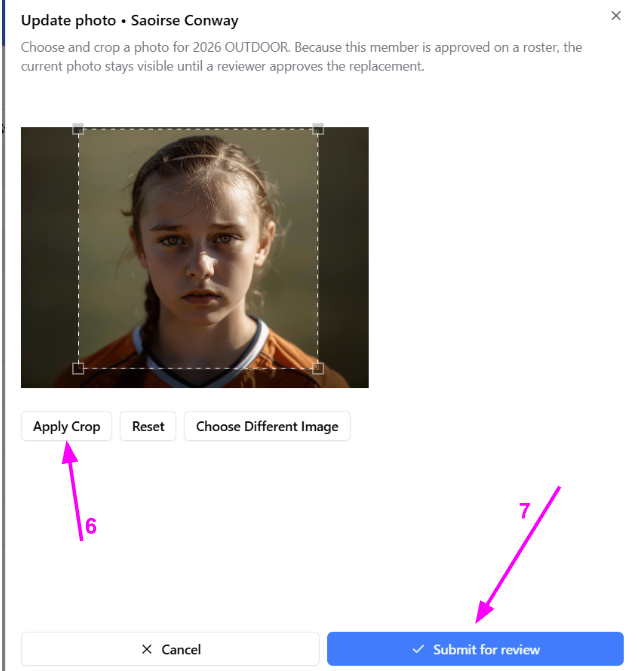
- Once approved, the new photo will appear on the official team roster and the member card.
NOTE:
Information on the pending replacement photo will become visible on the member profile, along with the ability to withdraw the request if needed.
Via the Member’s Profile Page
- After logging into the Govern module as a Club Administrator, navigate to the member’s profile page via clicking their name on a Team Roster page or search results on the Players or Staff search pages.
- Make sure the correct season is selected in the "Photo season" dropdown above the image.
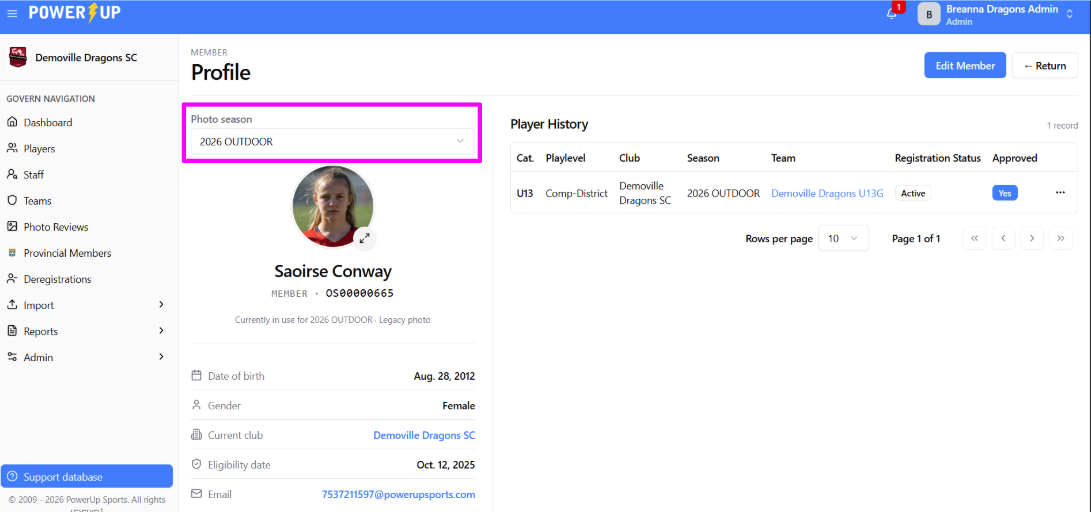
- Click the member’s photo above their name.
- A slideout will appear on the right. Click the Choose Different Imagebutton to select a new photo for the player.
- Note the text underneath the "Update photo" header at the top of the slideout. It confirms the current photo will continue to be used until the replacement photo is approved.
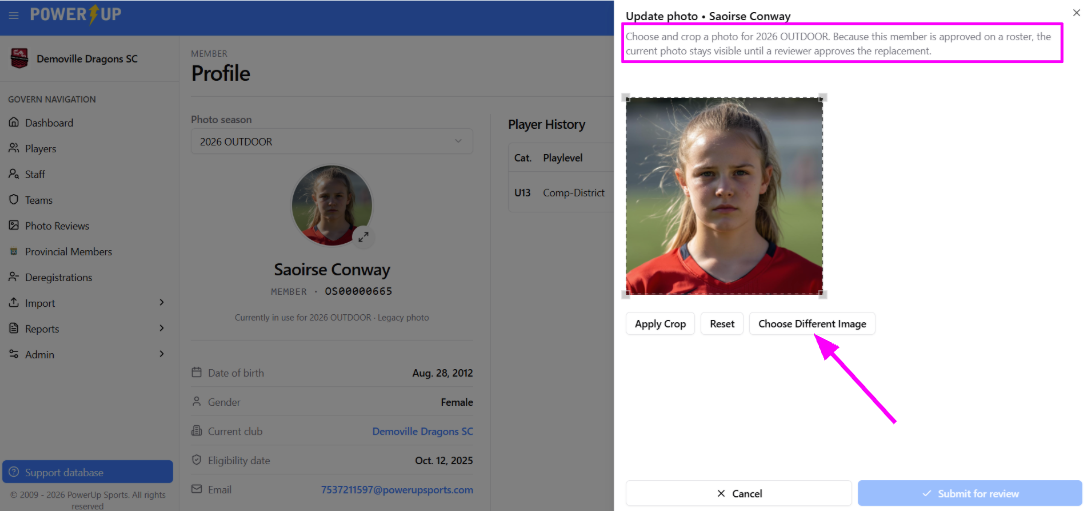
- Note the text underneath the "Update photo" header at the top of the slideout. It confirms the current photo will continue to be used until the replacement photo is approved.
- Select the desired new photo from your computer.
- You’ll be presented with a tool to crop the photo. Click and drag the corners to resize the cropped area, and click and drag the square to choose your crop area. Make sure it complies with your governing body’s requirements (e.g. head and shoulders, facing forward, no hats, etc.). When ready, click Apply Crop.
- When ready to proceed, click the Submit for Review button. This action will trigger a request for your District Admin to review and approve the replacement photo.
- Information on the pending replacement photo will become visible on the profile, along with the ability to withdraw the request if needed.
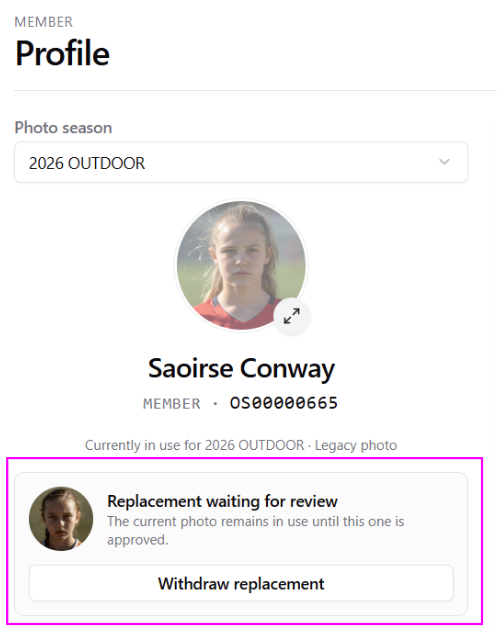
- Once approved, the new photo will appear on the official team roster and the member card.
Reviewing the Status of a Photo Request
Once a District takes action on a Photo Request (either approval or rejection), the club will receive a notification within Govern informing them of the outcome.
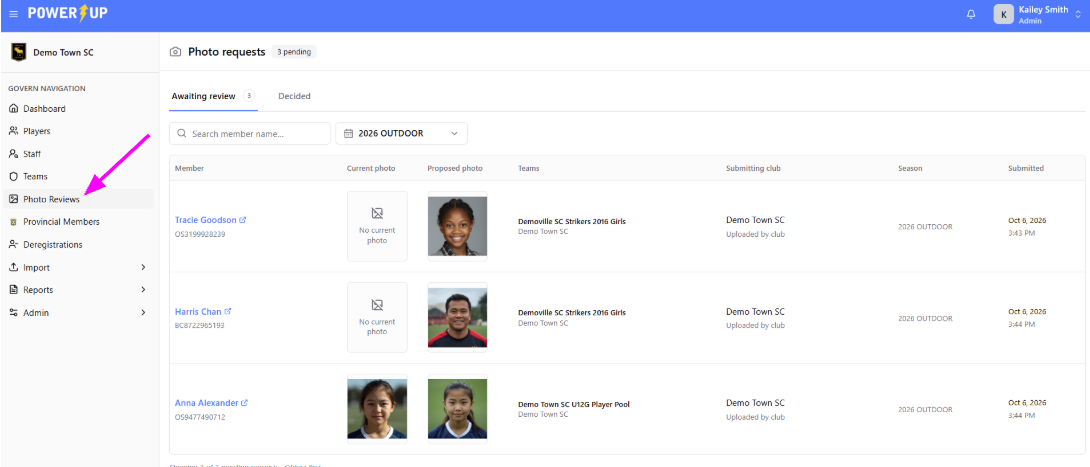
They can also monitor the list of photo requests and their status (pending, approved, rejected) via the Photo Reviews option in the Govern Navigation menu.
Select the desired tab (Awaiting Review or Decided) and ensure you select the correct season using the dropdown. You can also use the search bar to find a particular player if you need.
Was this article helpful?
That’s Great!
Thank you for your feedback
Sorry! We couldn't be helpful
Thank you for your feedback
Feedback sent
We appreciate your effort and will try to fix the article